
MultiBranchManager Multi Branch POS Software
Giá gốc là: 722.764₫.144.553₫Giá hiện tại là: 144.553₫.
MultiBranchManager is a feature-rich Point of Sale (POS) software designed to cater to businesses with multiple branches or locations. It offers a comprehensive solution for managing sales, inventory, and customer data across various outlets from a centralized system. The software streamlines operations, improves efficiency, and enhances overall business management by providing real-time data synchronization, consolidated reporting, and seamless communication between branches.
Demo Link: https://demo.amarlodge.com/
Supplier Management _ Create Suppliyer, Suppliyer list, Transfer Products, Suppliyer Account
Branch Management _ Create Branches, Branch list
Sales Management _ New Sale, View Sale, Return sale, Exchange Sale
Product Management _ Add Product, Add Category, Add brands, Add Variation, Transfer Product, Received Product, View Transfer & Received
Purchases Management _ New Purchase, View Purchase, Purchase Return
Cost Management _ New Cost, View Cost with Details
Cash Drawer Manage _ Cash In, Transfer, Payment Cost
Banks Management _ Add Bank, View Bank, Bank Transfer, Admin Transfer
Customer Manage _ Add Customer View Customer
Reports Management _ Report History, Generate Sale Report, Generate Stock Report, Generate Cr Master C R Report, Generate Product report.
User Management _ Designations, Sections, New User, View User
Payment Methods
Settings _ System Settings
Language Settings
To install the Script minimum server requirements are:
- Php version 8
- MySQL 5.6+
- mod_rewrite Apache
- BCMath PHP Extension
- Ctype PHP Extension
- JSON PHP Extension
- Mbstring PHP Extension
- OpenSSL PHP Extension
- PDO PHP Extension
- Tokenizer PHP Extension
- XML PHP Extension
- ZipArchive Extension
To install the script follow the steps below.
- Extract the downloaded .zip file from codecanyon on your PC.
- Upload the Install.zip file to your server public_html or any other directory you intend to run the script.
- Extract the zip file in that directory.
- Create a new database from your server MySQL database.
- Create a DB user to the database and link that database to the DB user.
- First, hit your site URL and it will automatically take you to the installation.
- Click on the Start Installation Process.
- You will get the Checking File Permission page. If everything is ok then click on Go to the next step.
- Now you need to set Database Host, Database Name, Database Username, Database Password, and click Continue.
- Now you need to import the SQL file.
- Now fill up the information of the shop and click Continue.
- Click on Go to Home/ Login to the admin panel.
Tặng 1 theme/plugin đối với đơn hàng trên 140k:
Flatsome, Elementor Pro, Yoast seo premium, Rank Math Pro, wp rocket, jnews, Newspaper, avada, WoodMart, xstore
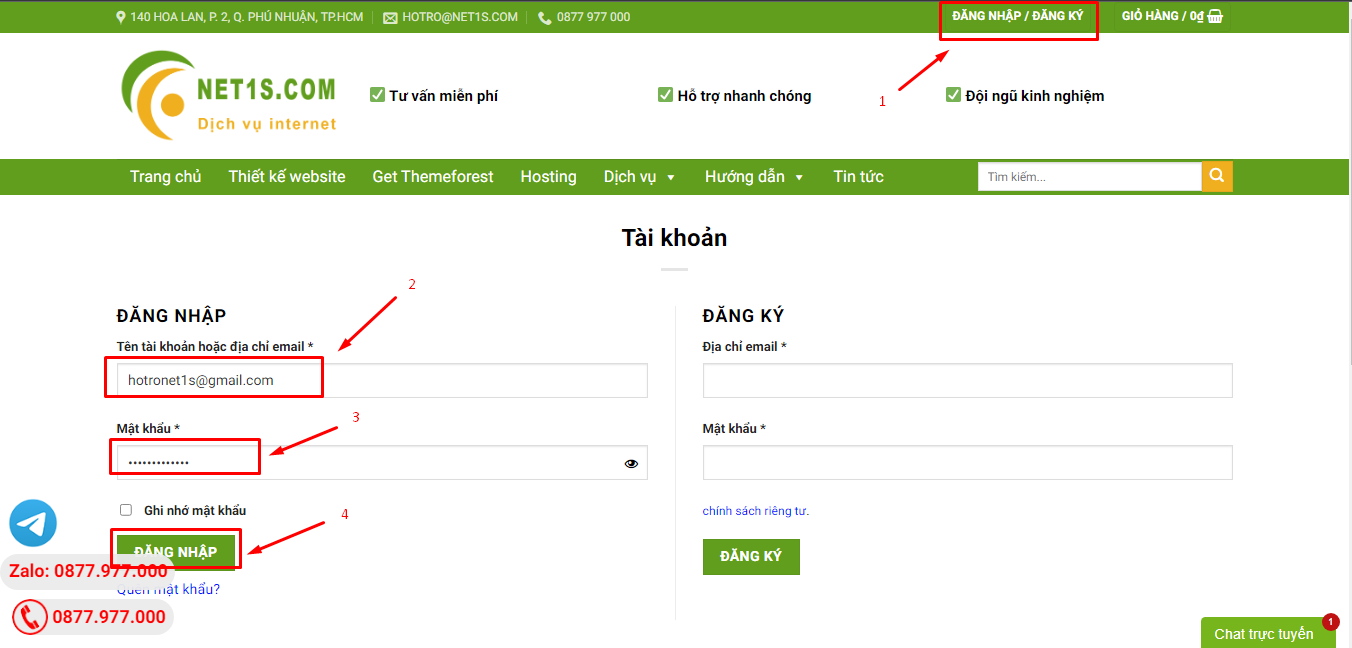
1. Bấm Đăng nhập/đăng ký.
2. Điền thông tin email, mật khẩu đã mua hàng -> bấm Đăng nhập.
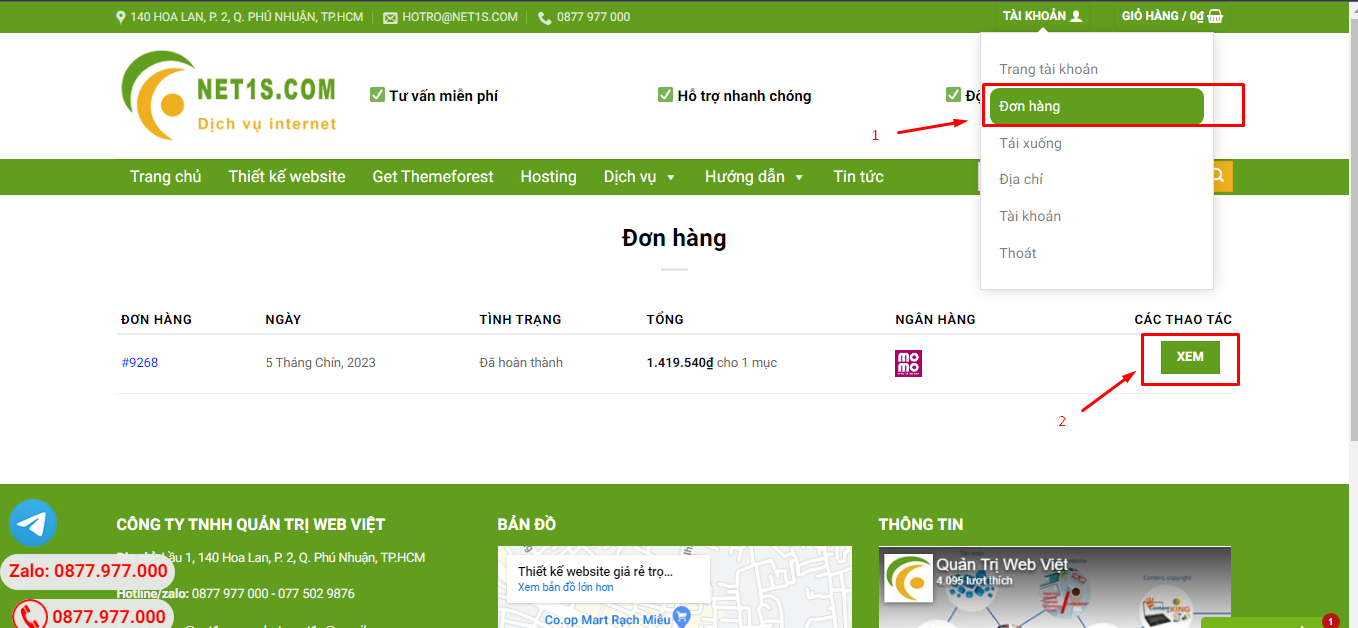
3. Di chuột đến mục Tài khoản -> Đơn hàng -> bấm vào Xem ở đơn hàng đã mua.
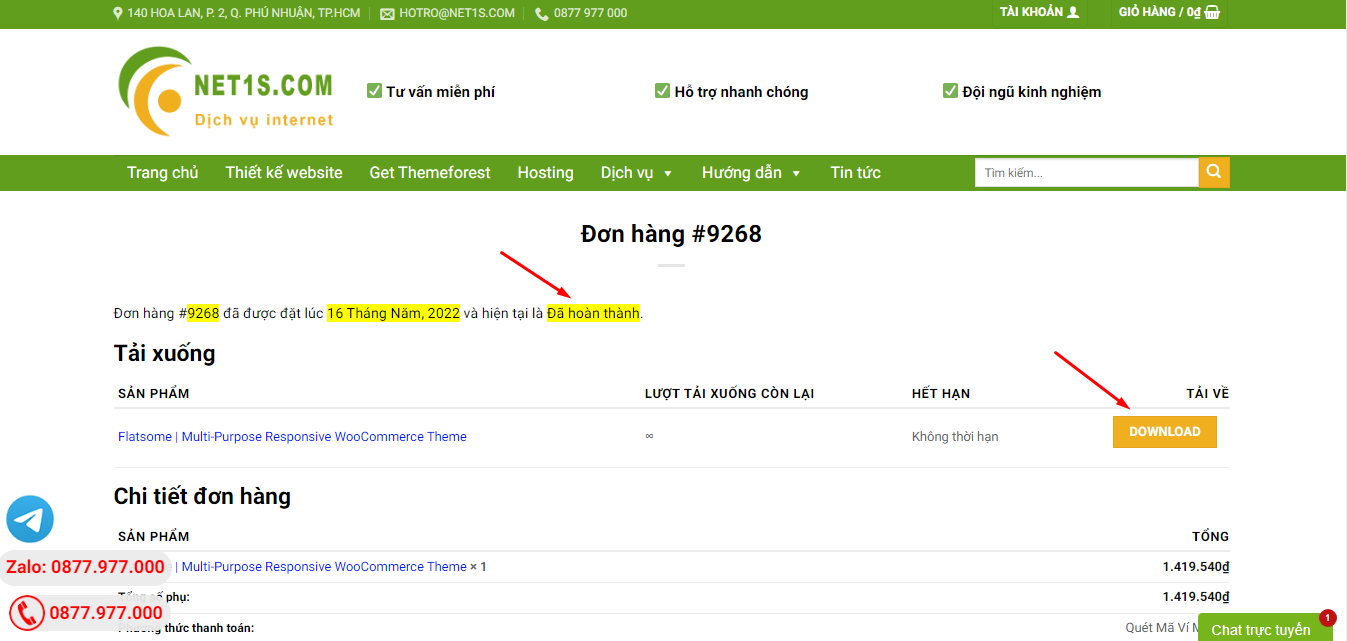
4. Đơn hàng hiển thị tình trạng Đã hoàn thành -> bấm vào Download để tải sản phẩm về.
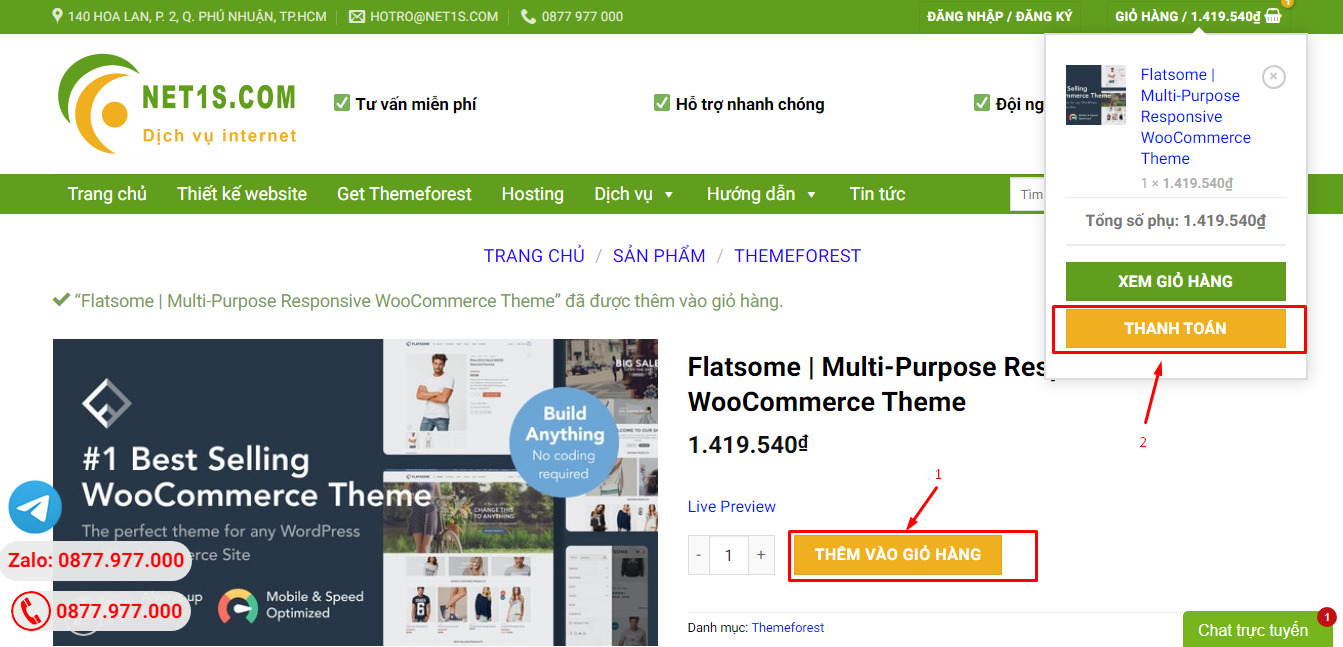
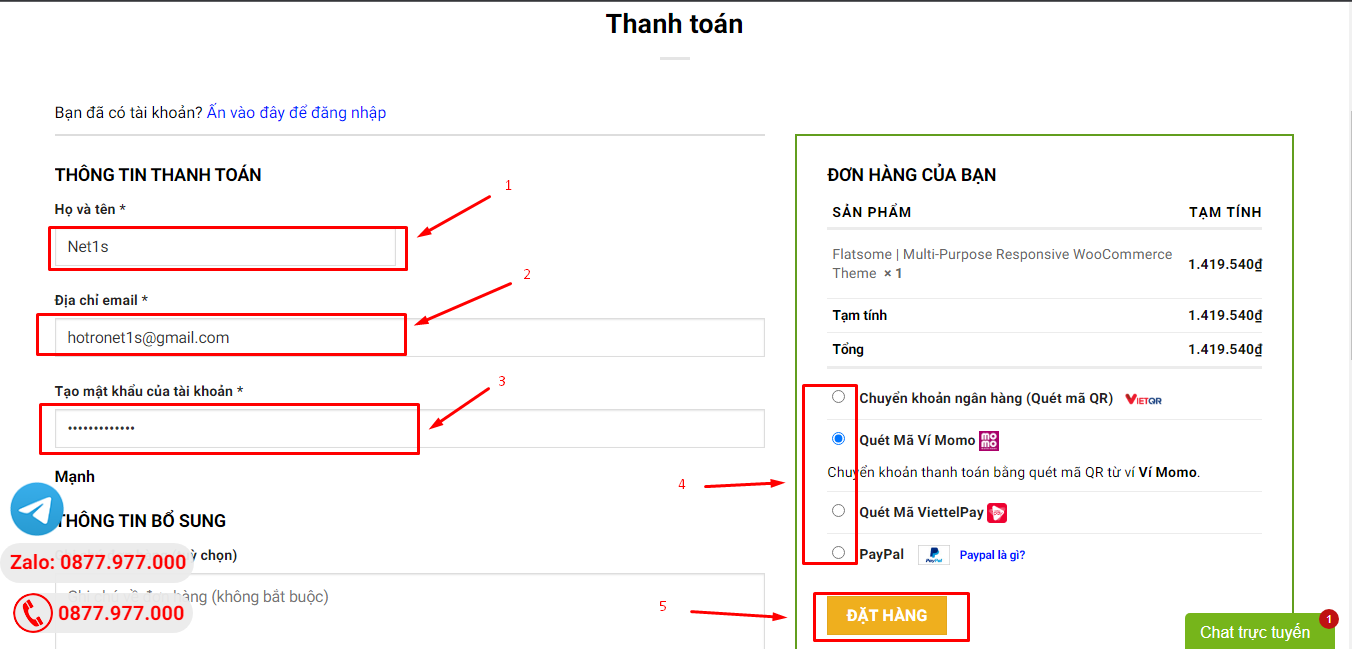
1. Bấm Thêm vào giỏ hàng -> bảng thông tin giỏ hàng sẽ hiển thị góc trên bên phải.
2. Bấm Thanh toán.
3. Điền thông tin thanh toán gồm: tên, email, mật khẩu.
4. Chọn phương thức thanh toán có hỗ trợ gồm: Chuyển khoản ngân hàng (quét mã QR), quét mã Momo, quét mã Viettelpay, Paypal.
5. Bấm Đặt hàng để tiếp tục.
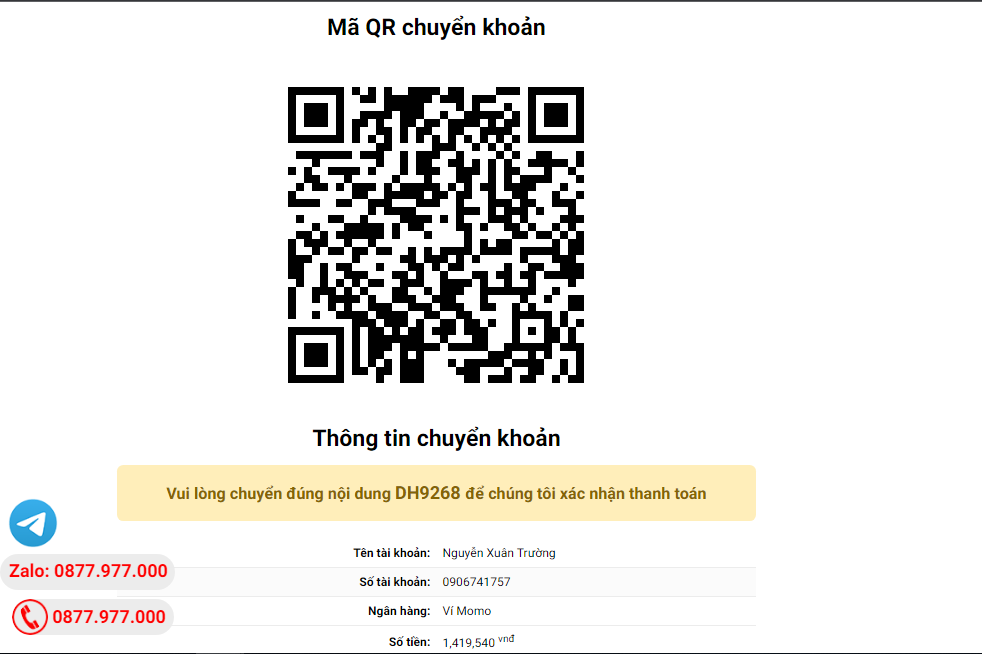
5. Thanh toán bằng cách quét mã QR (Nội dung chuyển khoản và số tiền sẽ tự động được tạo), hoặc chuyển khoản nhập số tiền và nội dung chuyển khoản như hướng dẫn.
6. Sau khi thanh toán xong đơn hàng sẽ được chúng tôi xác nhận đã hoàn thành và bạn có thể vào mục Đơn hàng để tải sản phẩm đã mua về.
Sản phẩm tương tự


